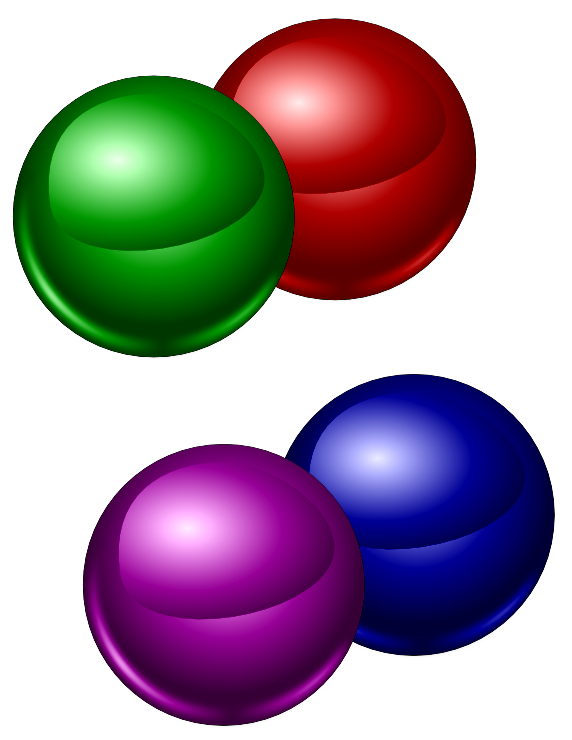
Blend mode "Overlay"
I have been searching and reading and know, that Inkscape doesn't come with the blend mode option "Overlay".
Is there any other way that I might achieve the same result as on the screen shot which I have attached?
I am pretty sure that I'll be able to create the gradients which have been made in Illustrator with the Gradient Mesh tool.
I don't have Illustrator anymore and I am very satisfied with Inkscape but I am still in the learning process.
Thank you and have a nice day
Re: Blend mode "Overlay"
You can try a little tenderness
Among filters you`ll find "Colorize" and at the bottom of that same drop-down menu, there`s Filter Editor which would enable you to adjust the color.
Re: Blend mode "Overlay"
Thank you, Maestral, it was very kind of you to answer my question.
And I've got your hint
Have a nice day
And I've got your hint
Have a nice day
Re: Blend mode "Overlay"
I really like your result, Maestral, but I am not able to do the same.
I have watched some tutorials on the Filter Editor but I don't know how to arrive to your result and I am not able to find a tutorial on Colorize..
Would you please help me or tell me what I am doing wrong?
The color changes but not the blend - it stays a solid color.
I have watched some tutorials on the Filter Editor but I don't know how to arrive to your result and I am not able to find a tutorial on Colorize..
Would you please help me or tell me what I am doing wrong?
The color changes but not the blend - it stays a solid color.
Re: Blend mode "Overlay"
Maestral wrote:Among filters you`ll find "Colorize" and at the bottom of that same drop-down menu, there`s Filter Editor which would enable you to adjust the color.
So...
- Select the Grey one (all shapes except the Red one)
- Group them (Ctrl+G)
- While having that group active/selected, go for the "Filters" drop-down menu
- Click on "Color" and than chose "Colorize" from the sub-menu
For adjusting colors, you`ll now have Colorize instead of filter1 in Filter Editor.
Click on Flood, which would show you Flood color at the bottom.
Try again, with a little more tenderness ,)
Re: Blend mode "Overlay"
Maestral wrote:You can try a little tenderness
Good try Tom Jones, but Otis Redding can do it best
About the filter issue. I've tried a quick test here, and It seems that you have to group all the shapes that conform your design. And then apply the filter to the Group
. I've also transofrmed all the shapes to paths.
Another trick could be just duplicate the original design, Union all their shapes to create a "masking shape". In your case there will be ease as your shape is a big circle. Well just change the opacity of the "masking shape" to 25% or 50%, and change the color too.
If you have problems:
1.- Post a sample (or samples) of your file please.
2.- Please check here:
http://tavmjong.free.fr/INKSCAPE/MANUAL/html/index.html
3.- If you manage to solve your problem, please post here your solution.
1.- Post a sample (or samples) of your file please.
2.- Please check here:
http://tavmjong.free.fr/INKSCAPE/MANUAL/html/index.html
3.- If you manage to solve your problem, please post here your solution.
Re: Blend mode "Overlay"
You guys rock! Thank you so much - I'll try to work on it now
Re: Blend mode "Overlay"
Woo Hoo - that worked out fine The colors are not so vivid as they are with an Overlay but I believe that I just have to play around with them
Thank you both!
Thank you both!
Re: Blend mode "Overlay"
Thank you again, Maestral - I'll try to keep the lighter parts separated and maybe add a Gaussian blur to them
Re: Blend mode "Overlay"
If it's just the hue (colour) you want to change, you could use this approach:
1) Draw your image using one pure colour as a base. For example, you could re-create this design using gradients that run from white to black, with a middle stop of pure red.
2) Group the design.
3) Add a filter to the group. The only filter effect you need to add is "Colour Matrix".
4) In the filter effect's properties, select "Hue Rotate" for the type.
5) Move the slider to change to different colours.
Re: Blend mode "Overlay"
Thank you very much, Xav - I will definitely try your method!
Re: Blend mode "Overlay"
I actually tried several different methods, but they all suffered from either losing the white (so highlights become pink when using a red colour) or losing the blacks (so shadows become murky red). I'm sure there's a cunning approach that would do the trick by combining masks, clones and filters, but it's likely to be complex.
This approach (of using a three-stop gradient then rotating the colours with a filter) was the only "simple" solution I could find that also kept the highlights and shadows intact.
Re: Blend mode "Overlay"
Thanks Xav, for this gem.
Re: Blend mode "Overlay"
I must do something wrong....
I would like this but get something else - interesting, but not exactly what I would like though.
But thank you for all your effort
I would like this but get something else - interesting, but not exactly what I would like though.
But thank you for all your effort
Re: Blend mode "Overlay"
Change the flood fill's colour to white in the filter ^.
Maybe it's that I'm listening to overkill, but when I try to save as any "tricky" blending to pdf, the result gets "thrashy".
Will try it with a german interpretation.
Edit:
Could make this test image
https://openclipart.org/detail/204401/blending-test-by-lazur-urh-204401.
Pdf seems broken.
At least it gives an idea how the filtering can be avoided if you have a black to transparency and a white to transparency gradient linked to eachother over a solid fill colour.
The filtering has a known bug https://bugs.launchpad.net/inkscape/+bug/850987, the others should work.
Re: Blend mode "Overlay"
@ Janne
If you can make a one, others would follow but with a bit more accurate apply of the Xav`s suggestion:
- duplicate or clone the finished grouped object/shape (red, in my example),
- select that new one,
- in "Filter Editor", add "New" filter and make it active (check-box)
- chose "Color Matrix" from the menu and click on "Add Effect",
- chose "Hue Rotate" as a "Type",
- move that "Value(s)" slider till desired color appear.
@ Lazur
Was intrigued with your remark but could not reproduce it. There are "black to transparency" and "white to transparency" gradients on these above but pdf looks alright. Problem appeared when "Rasterize filter effects" was unchecked, but that I would expect. Have I missed something?
Re: Blend mode "Overlay"
Okay, here's my best effort. In the background is a group of greyscale gradients (actually just one gradient, re-used) to create the general highlights and shadows. On top of that is a coloured circle with a filter applied. The filter uses the composite operation twice: once to combine the colour with the background, and the other to clip the result so that it's confined within the circle. Just change the colour of the circle as normal to modify the bauble.
In the filter editor you can select the first composite and then play around with the K1-4 sliders to adjust the amount and size of the highlights and shadows - but it's pretty much trial and error to be honest.
This relies on using the "background image" input in the filter. This requires an extra bit of data to be put into the XML that Inkscape doesn't include by default. The easiest way to add it is to open the Layers dialog, select a different blend mode, then just switch it back to normal - changing blend modes causes Inkscape to add the XML.
- Attachments
-
- baubles.svg
- (10.92 KiB) Downloaded 198 times
Re: Blend mode "Overlay"
Maestral wrote:@ Lazur
Was intrigued with your remark but could not reproduce it. There are "black to transparency" and "white to transparency" gradients on these above but pdf looks alright.
Asked around it on the live chatboard and it is affected by the system as well.
I remember the answer was inkscape uses poppler to open pdf-s, and cairo to save as pdf-s.
The cairo I'm using is probably outdated.
On linux, cairo is not boundled in the program but the operating system, so maybe upgrading would solve it.
Re: Blend mode "Overlay"
THANK YOU - this is absolutely amazing! I will try to redo your work following your instructions, Xav.
You have all been very helpful - it's time to pay back
https://www.youtube.com/watch?v=ZVMIk3xYaYo
You have all been very helpful - it's time to pay back
https://www.youtube.com/watch?v=ZVMIk3xYaYo
Re: Blend mode "Overlay"
Almost there - now I just have to learn to use the gradients
Re: Blend mode "Overlay"
This may help adjusting the radial gradient's handles and centre.
- Attachments
-
- hlp156.png (226.92 KiB) Viewed 7154 times
Re: Blend mode "Overlay"
Thank you, Lazur
Actually it's a good idea to trace the bitmap and check the colors out - I'll try to remember that
Re: Blend mode "Overlay"
Thank you - here is my final result
Gradients are made with 50% gray to white.