How do I apply a filter effect to a path so the changes are permanent? That is, the path is changed with added nodes so it matches visually whatever the effect had done.
I'm trying to copy a path from Inkscape to Gimp. I have a path with a Roughen effect. I save the path out to an SVG file and then import the SVG into Gimp from its Path panel. The path I get in Gimp is the original path without the Roughen effect.
How to apply filter effect to path permanently?

Re: How to apply filter effect to path permanently?
You can't apply a filter effect to a path in the way you want. Filter effects are purely visual and occur at the point of converting the SVG to a bitmap for rendering on-screen or to a file. They don't create new nodes or any other vector elements that could be applied to the original image. Although the filter information is in the SVG file, it appears that support for filters hasn't been implemented in The Gimp, so it just isn't applying them as the last part of its rendering process.
With that said, as you're trying to use the image in The Gimp anyway, you're obviously creating a bitmap at the end of the process. In that case you could either export the filtered path as a PNG file then just drag it into your image window in The Gimp for it to be loaded into a new layer, or you can use Edit > Make a Bitmap Copy to "fix" the filter effect into a bitmap that's included in your SVG file. But perhaps the best solution would be to use File > Save As to save your image as an XCF file. This is a bitmap image in The Gimp's native format, but does include layer information from Inkscape. Don't forget to also save an SVG version if you'll need to edit the original in future.
With that said, as you're trying to use the image in The Gimp anyway, you're obviously creating a bitmap at the end of the process. In that case you could either export the filtered path as a PNG file then just drag it into your image window in The Gimp for it to be loaded into a new layer, or you can use Edit > Make a Bitmap Copy to "fix" the filter effect into a bitmap that's included in your SVG file. But perhaps the best solution would be to use File > Save As to save your image as an XCF file. This is a bitmap image in The Gimp's native format, but does include layer information from Inkscape. Don't forget to also save an SVG version if you'll need to edit the original in future.
Re: How to apply filter effect to path permanently?
If you want to include paths in gimp roughened a bit, you can try using the sketch live path effect.
Though it is a bit of an overkill for the problem.

Though it is a bit of an overkill for the problem.
Re: How to apply filter effect to path permanently?
maybe apply the roughen in gimp
inkscape => edit path => svg => gimp
select path
tool Path (B)
trace path with a dynamic brush
inkscape => edit path => svg => gimp
select path
tool Path (B)
trace path with a dynamic brush
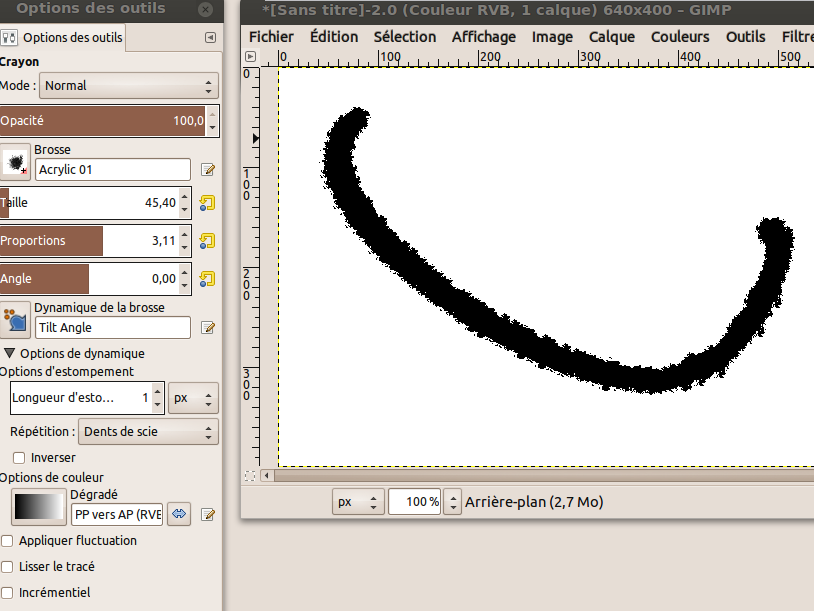
- roughenpath.png (81.24 KiB) Viewed 10379 times
Re: How to apply filter effect to path permanently?
Will an 'Object to path' after applying the filter not solve the problem?
Re: How to apply filter effect to path permanently?
Janne wrote:Will an 'Object to path' after applying the filter not solve the problem?
No, as I said in my reply: "Filter effects are purely visual... they don't create new nodes or any other vector elements that could be applied to the original image".
Although the filter being referred to is the Roughen effect, we could equally be talking about any other filter. In those terms it's obvious that something like a Blur couldn't be converted into a path because it's a purely visual bitmap effect. Roughen is the same, it's just that the appearance has harder edges so looks more like a real vector object.
Re: How to apply filter effect to path permanently?
Janne wrote:Will an 'Object to path' after applying the filter not solve the problem?
This didn't do anything for me. When I import into Gimp, the path is still the original, un-roughened path.
I actually want the path to be a path in Gimp and not as a bitmap because I'll be using it for selection. I'm looking into Fractalize extension to achieve what I want.
Re: How to apply filter effect to path permanently?
Janne wrote:Will an 'Object to path' after applying the filter not solve the problem?
No. But filling the roughen path could.
Even if I don't think it will perform any better than a sketch LPE
-
Espermaschine

- Posts: 892
- Joined: Thu Jun 05, 2014 9:10 pm
Re: How to apply filter effect to path permanently?
sassafras wrote:Janne wrote:Will an 'Object to path' after applying the filter not solve the problem?
This didn't do anything for me. When I import into Gimp, the path is still the original, un-roughened path.
I actually want the path to be a path in Gimp and not as a bitmap because I'll be using it for selection. I'm looking into Fractalize extension to achieve what I want.
I dont understand what you are trying to do, but there are several ways to save a selection in Gimp, other than with a path.
For example if you export your roughened Inkscape path on a transparent background, you can do an alpha to selection and then save that selection to a channel in Gimp
If its exported on an opaque background, you can select the object with the 'Select by Colour Tool'.
Can you tell us what exactly you are trying to do ?
Last edited by Espermaschine on Wed Mar 11, 2015 1:02 pm, edited 1 time in total.
Re: How to apply filter effect to path permanently?
You could roughen the path with a path effect, or maybe the Tweak tool. And then you can use Object to Path, and have what you want. (If I understand correctly.) But not with a filter.
Basics - Help menu > Tutorials
Manual - Inkscape: Guide to a Vector Drawing Program
Inkscape Community - Inkscape FAQ - Gallery
Inkscape for Cutting Design
Manual - Inkscape: Guide to a Vector Drawing Program
Inkscape Community - Inkscape FAQ - Gallery
Inkscape for Cutting Design
Re: How to apply filter effect to path permanently?
brynn wrote:You could roughen the path with a path effect, or maybe the Tweak tool. And then you can use Object to Path, and have what you want. (If I understand correctly.) But not with a filter.
I could not find the Roughen path effect. It is not listed when I go to Add Path Effect. Are you talking about this: http://wiki.inkscape.org/wiki/index.php ... 92#Roughen Is this for v0.92? I'm using v0.91.
I tried Sketch and Hatches (rough) and I don't think either are what I want.
Espermaschine wrote: For example if you export your roughened Inkscape path on a transparent background, you can do an alpha to selection and then save that selection to a channel in Gimp. If its exported on an opaque background, you can select the object with the 'Select by Colour Tool'.
I tried this and it worked well enough so I'll keep this in mind for next time.
I was looking to alter a path so it is jagged but natural looking, similar to what Fractalize can do, but with the option to tweak or undo if I change my mind. Then in Gimp, with the path, I want to paint only the area inside and not change anything outside.
-
Espermaschine
- Posts: 892
- Joined: Thu Jun 05, 2014 9:10 pm
Re: How to apply filter effect to path permanently?
sassafras wrote:I was looking to alter a path so it is jagged but natural looking, similar to what Fractalize can do, but with the option to tweak or undo if I change my mind. Then in Gimp, with the path, I want to paint only the area inside and not change anything outside.
there is something in Gimp under 'Select' named 'Distort'
it has quite a few options which lets you fine tune how much you want to distort any selection
Gimp-Science-Labs
Re: How to apply filter effect to path permanently?
I could not find the Roughen path effect. It is not listed when I go to Add Path Effect. Are you talking about this: http://wiki.inkscape.org/wiki/index.php ... 92#Roughen Is this for v0.92? I'm using v0.91.
I guess I was thinking of the Sketch path effect. But the Tweak tool should be able to make a rough path which you can edit with the Node tool.
Basics - Help menu > Tutorials
Manual - Inkscape: Guide to a Vector Drawing Program
Inkscape Community - Inkscape FAQ - Gallery
Inkscape for Cutting Design
Manual - Inkscape: Guide to a Vector Drawing Program
Inkscape Community - Inkscape FAQ - Gallery
Inkscape for Cutting Design
Re: How to apply filter effect to path permanently?
Espermaschine wrote:there is something in Gimp under 'Select' named 'Distort'. it has quite a few options which lets you fine tune how much you want to distort any selection
Top
-
Espermaschine
- Posts: 892
- Joined: Thu Jun 05, 2014 9:10 pm
Re: How to apply filter effect to path permanently?
sassafras wrote:I tried it out. It wouldn't work for me as it doesn't have a live preview so I won't know what it'll look like until I hit Ok. It would be too cumbersome going back and forth.
yeah, i know what you are talking about
Gimp has its weak points
-
sketch1046
- Posts: 2
- Joined: Thu Apr 21, 2016 3:07 pm
Re: How to apply filter effect to path permanently?
I am totally new to this forum, so this is my first post...
to turn a roughen filter effect to a path, if the filter is suitable to be described by a path,
like a path with a roughen filter applied, black fill and no outline,
select your filtered path in inkscape, export it to an png image using export selection,
then open the image in gimp...
then choose the option to select by colour, to select the roughened path,
then at the bottom of the paths palette is a small icon like a red circle with a node with handles top and bottom,
just click that to make a path based on the selection..., then right click the path in the paths palette, and choose copy
go back to inkscape and choose paste... voila, you have what you were asking for, a roughen filter converted to a path...
/home/gb/graemes inkscape/roughened-stroke as path.svg
- Attachments
-
- roughened-stroke as path.svg
- (20.5 KiB) Downloaded 289 times
-
Espermaschine
- Posts: 892
- Joined: Thu Jun 05, 2014 9:10 pm
Re: How to apply filter effect to path permanently?
sketch1046 wrote:then open the image in gimp...
then choose the option to select by colour, to select the roughened path,
then at the bottom of the paths palette is a small icon like a red circle with a node with handles top and bottom,
just click that to make a path based on the selection..., then right click the path in the paths palette, and choose copy
go back to inkscape and choose paste... voila, you have what you were asking for, a roughen filter converted to a path...
Gimp doesnt produce very acurate paths from selection, although that may not be a problem in this case.
I wonder why you not just export to bitmap and then trace in Inkscape....
.
- Attachments
-

- GimpPath.jpg (18.37 KiB) Viewed 8476 times
Re: How to apply filter effect to path permanently?
Or create a bitmap copy, by pressing Alt+B.
-
Espermaschine
- Posts: 892
- Joined: Thu Jun 05, 2014 9:10 pm
Re: How to apply filter effect to path permanently?
Lazur URH wrote:Or create a bitmap copy, by pressing Alt+B.
Yes, but you have to adjust the resolution in the preferences first, i think.
-
Refaeliadria
- Posts: 2
- Joined: Fri Apr 22, 2016 7:21 pm
Re: How to apply filter effect to path permanently?
Wow! This is the most helpful and informative description of working with paths, shapes, and smart objects I've found to date. Thank you!
-
Espermaschine
- Posts: 892
- Joined: Thu Jun 05, 2014 9:10 pm
Re: How to apply filter effect to path permanently?
Refaeliadria wrote:smart objects
m-hm
-
sketch1046
- Posts: 2
- Joined: Thu Apr 21, 2016 3:07 pm
Re: How to apply filter effect to path permanently?
@Espermaschine ... and @Lazur URH --- thanks for showing me how to do that, that's quicker and smarter and more useful than my method, and it has an advantage too of staying inside inkscape.. I didn't know you could just convert to a bitmap so easily and quickly.. I learn something new every day... thank you
Re: How to apply filter effect to path permanently?
Xav wrote:You can't apply a filter effect to a path in the way you want. Filter effects are purely visual and occur at the point of converting the SVG to a bitmap for rendering on-screen or to a file. They don't create new nodes or any other vector elements that could be applied to the original image.
Is this still true? I'm using version 0.92 at the moment.
I have a design that started from a traced bitmap. I used a COLOR filter, Solarize, to change the color of all 10 objects in the group. But, when I shared my SVG with the printing company they sent back an image with the original colors, I assume due to them opening the file in Adobe without the filter.
I can't figure how to apply the filter colors to the paths. I can understand why some of the filters would be raster only, but it seems like color filters should apply directly to the fill and stroke properties of the paths themselves. Or, at least be easily applied to the paths in some way by "finalizing" the filters.
Sorry, if I'm not being clear. I'm very new to Inkscape.
Re: How to apply filter effect to path permanently?
Yes, it's still true. The issue isn't the version of Inkscape, it's the way filters are defined in SVG.
Taking a colour-affecting filter as an example: it might seem obvious that the new colour can just be applied to the fill and stroke - but it's only obvious if you're dealing with simple objects with flat colours. Consider objects filled with patterns and gradients, with varying opacities, overlapping one another. You can group all the objects and apply a filter to the group, but clearly there's no straightforward way to apply the colour changes to every constituent part in such a way that the final result will look the same.
For a simple case, however, you can work round it by applying the filter to a copy of your shape, then using the tool to apply the filtered colours to the fill and stroke of the original, before removing the filtered copy.
Taking a colour-affecting filter as an example: it might seem obvious that the new colour can just be applied to the fill and stroke - but it's only obvious if you're dealing with simple objects with flat colours. Consider objects filled with patterns and gradients, with varying opacities, overlapping one another. You can group all the objects and apply a filter to the group, but clearly there's no straightforward way to apply the colour changes to every constituent part in such a way that the final result will look the same.
For a simple case, however, you can work round it by applying the filter to a copy of your shape, then using the
tool to apply the filtered colours to the fill and stroke of the original, before removing the filtered copy.