Yes, unfortunately we have found that some websites where we might upload images, cannot display the transparent background. It displays it as black instead. There's nothing we or Inkscape can do about that. It's a problem with the website where you're uploading it. I always used to have trouble with ImageShack. But plenty of other places have the same problem.
However, the image is still correct. If someone downloads it, they will have the correct transparent background.
Unless you mean that you want a white background? If that's the case, see further below about making a white background.
The problem with the black in the antlers, is because that's the top edge of the pattern. I think I explained before about how to adjust the pattern, but I'll do it again.
1 - Click on the path with the Node tool
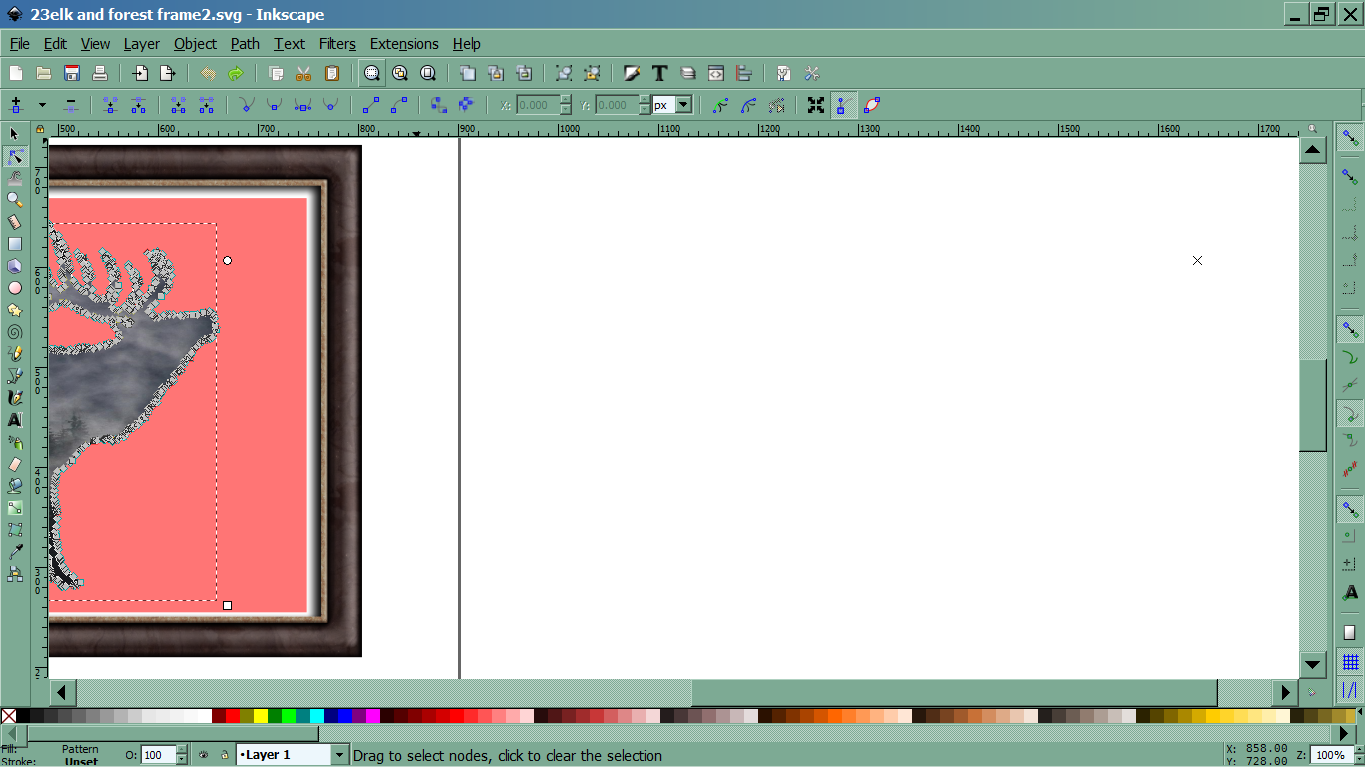
2 - Look for the pattern handles, which are a tiny X, a tiny circle, and a tiny square.
X - moves the whole pattern around
circle - rotates it
square - adjusts the size (hold Ctrl to keep proportions)
Normally we find the X handle on the left and the circle and square on the right. But somehow, this one has been flipped over, so that the X handle is on the right. Here's a screenshot showing the pattern handles circled in blue. You can only see them with the Node tool (

)

 e1.png
(229.05 kB . 1365x767)
(viewed 3751 times)3 - I think your path is a little bit taller than the pattern. But that will be easy to fix.
3a - Drag the X handle so that it's just a tiny big above the top of the elk path. Actually you can drag the X over closer to your path, so it's easier to see what you're doing. You can easily see when the pattern is fitting.
3b - Hold the Ctrl key while you drag the square handle, diagonally down and to the left. You'll see the pattern gets a little bit bigger. It doesn't need to be very much bigger though.
3c - Be sure to check all 4 sides.
Now I have a tip for you to make the background. You don't have to cut out around it. You can put your path right on top. Well, unless you really want it to be cut out, with a white border between the path and the background? Look at your SVG file which I changed a little bit.
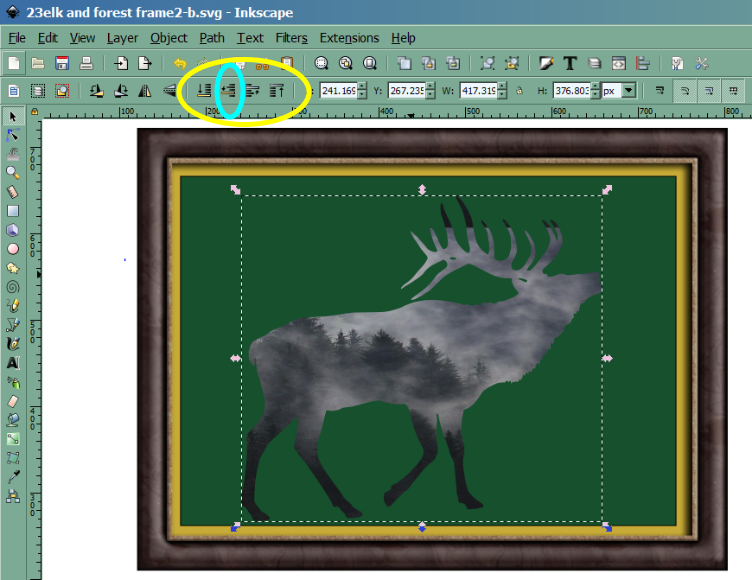
Have you learned about these buttons yet, in the yellow circle in the screenshot below? You can move objects up and down. You can put objects behind each other or on top of each other. You can also find those buttons in the Objects menu, and you can also do the same thing with keyboard shortcuts. (You'd have to look up the shortcuts, because I don't have them on the tip of my tongue. But for now, use the buttons for learning.) The order of the objects in the up and down direction, is called the z-order.

 e2.png
(249.37 kB . 752x580)
(viewed 3732 times)Select the elk path, and click the button I have circled in aqua, once. If nothing happens, click again once or twice. At some point, it will seem to disappear. But really, it's just behind the green rectangle.
You have to be very careful with these, and count your clicks, to keep from getting lost. When you click and the elk disappears, it has been moved behind the green rectangle. If you click the button once more, it will put the elk behind the kind of yellowish/tan rectangle.
Very Important -- If you move an object behind something else, and it accidentally becomes deselected, here's how you can re-select it. Place the mouse over top of where you think it probably is. Hold the Alt key. Click once to select the top object. Click again to select the next one down. And on and on.
How can you tell what's selected, if you can't see it? Watch the status bar. The status bar tells you what kind of object is selected (if you're using the Selection tool only).
You've probably figured this out, but just in case. If you want a white background, just fill the rectangle with white.
Why is the frame missing? I'm not sure. My best guess is that you had only selected the red rectangle, when you exported it. The next time you try, make sure the frame is selected.